Building a Cross-Platform eBook App in SCADE


This tutorial aims at introducing mobile developers to developing a cross-platform e-reader app solely using Swift and SCADE.
The user interface of the eBook is inviting, and accessing it is quite simple. On the home page, it shows you four categories of books to make a selection from. Its navigation bar at the bottom also allows for an easy transition from one page to another. Users can also search for books and check out their overviews offline before proceeding to read the books online within the app.
Most importantly, in this tutorial, we will detail the step-by-step method of building this eBook app with SCADE. This is an excellent attempt to start with if you're new to SCADE development.


Prerequisites
Download and install SCADE on your machine. You can find SCADE's latest version here
Learn how to create a SCADE project from scratch and give it any name of your choice.
In the event that you are absolutely uninitiated with the framework, click here to install SCADE on your computer using the official documentation, and click here to learn how to create your first project.
Getting Started
Place the images in this link into the Assets folder of your newly created project.
Additionally, create a folder named managers inside the project's root folder to hold all the necessary resources, including the classes (Book class, Genre class, and CategoryManager) and API callers that are required to complete the app's development.
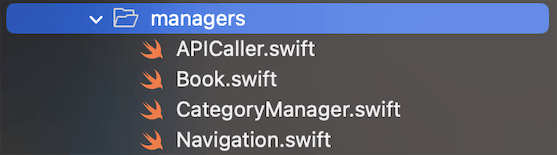
Step One: Let´s build our manager folder
Now, create the following three files inside the managers folder:
Make sure to create the Genre class, Book class and TrendingBookResponse struct with each of them with their much-needed inheritance inside the Book.swift file.
Check this link in the project folder to see the full code of the code snippet given below:
import Foundation
import ScadeKit

class Genre: EObject {
  let name: String
  let books: [Book]
  let lbCategory: String

  init(name: String, books: [Book], lbCategory: String) {
    self.name = name
    self.books = books
    self.lbCategory = lbCategory
  }
}

struct TrendingBookResponse: Codable {
  let items: [Book]?
}

class Book: EObject, Codable {
  let id: String
  let volumeInfo: VolumeInfoElements
  let publisher: String?
  let previewLink: String?
}
........
The next thing is to connect our Book class model to the API callers in the ApiCaller.swift file to generate data for each of our four book categories (such as Adventurous Books, Fantasy Books, Horror Books, and Health Books) and searched books.
View the full code for the provided code snippet:
import Foundation

struct constants {
  static let API_Key = "AIzaSyB_rT2ztHdM7Ac095GgMbzZfNeL_o_-m1U"
  static let baseURL = "https://www.googleapis.com/books/v1/volumes?"
}

enum APIError: Error {
  case FailedTogetData
}

class APICaller {

  static let shared = APICaller()

  func getBooksOfGenre(with name: String, completion: @escaping (Result<[Book], Error>) -> Void) {
    .......
  }

  func getAdventurousBooks(completion: @escaping (Result<[Book], Error>) -> Void) {
   ......
  }

  func getHealthBooks(completion: @escaping (Result<[Book], Error>) -> Void) {
   ......
  }

  func getBook(with query: String, completion: @escaping (Result<[Book], Error>) -> Void) {
   ......
  }
}
Create inside the CategoryManager.swift file a CatalogManager class to house the loadDataAsync and fetchGenre methods that we'll use in loading our books images and connecting book categories data to our main view (main.page) respectively.
Check out the full code for the code snippet below:
import Foundation
import Dispatch

class CatalogManager {
  static let shared = CatalogManager()

  static func loadDataAsync(
    from urlString: String, queue: DispatchQueue,
    onSuccess: @escaping (Data) -> Void
  ) {
    loadDataAsyncWithResult(from: urlString) { result in
     ......
    }
  }

  static func loadDataAsyncWithResult(
    from urlString: String,
    completion: @escaping (Result<Data, Error>) -> Void
  ) {
      ......
    }
  }
Lastly, in this step, all the necessary methods we want for easy back-and-forth navigations of various pages of our app project are created inside the Navigation.swift file.
Check out the complete code of the Navigation.swift file's code sample supplied below:
import ScadeKit

class Navigation {

  enum Page: String, CaseIterable {
    ......
    var fileName: String {
      return "\(self.rawValue).page"
    }

    func createAdapter() -> SCDLatticePageAdapter {
      switch self {
      ......
      }
    }
  }

  private static var adapters: [Page: SCDLatticePageAdapter] = [:]

  private static var transitionsStack: [Page] = []

  private static var current: Page? {
    return self.transitionsStack.last
  }

  static func adapter(by page: Page) -> SCDLatticePageAdapter? {
    ......
  }

  /// Start point of GUI part of application.
  static func show(_ page: Page, in view: SCDLatticeView) {
    ......
  }

  static func go(
    _ page: Page, clearHistory: Bool = false
  ) {
    ......
  }

  static func go(
    _ page: Page, with data: Any, clearHistory: Bool = false
  ) {
    ......
  }

  static func go(
    _ page: Page, clearHistory: Bool = false, transition: SCDLatticeTransition = .FROM_RIGHT
  ) {
    ......
  }

  static func back() {
    ......
  }

  private static func navigation(by page: Page, clearHistory: Bool = false) -> SCDLatticeNavigation?
  {
   ......
  }
}
Step Two: Design the Launch Screen
Create another folder named login inside the root folder of the project. The login folder is where we are going to be putting the newly created login page:

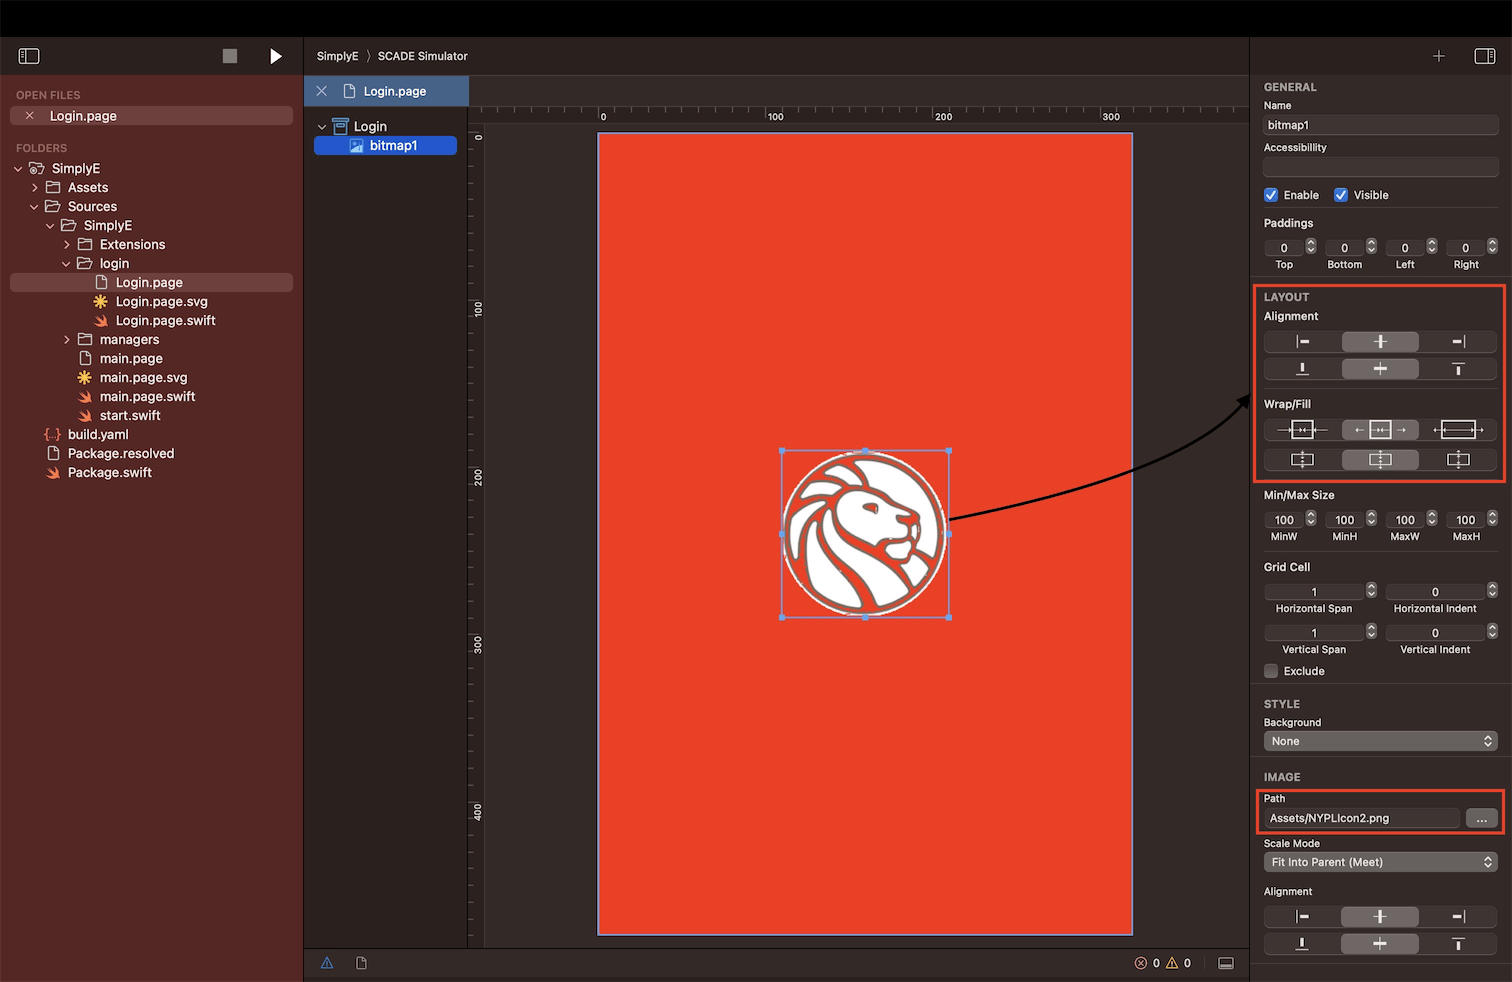
We'll configure the login page inside the start.swift file to be the first screen visible to the users when the application's launched.
We designed the login page to display a logo sitting centrally on an orange background, while some data for the next pages are being fetched:
Next is to write the logic that will make this page work. Inside the Login.page.swift file, we created the postDisplayActions() method to help users automatically navigate to the main page from the login page whenever the app is launched.
That's not all, to make postDisplayActions() method effective, we ensured that it's called inside the show() method and not inside the load()method:
import Dispatch
import Foundation
import ScadeKit

class LoginPageAdapter: SCDLatticePageAdapter {

  // page adapter initialization
  override func load(_ path: String) {
    super.load(path)
  }

  override func show(view: SCDLatticeView?) {
    super.show(view: view)
    self.postDisplayActions()
  }

  func postDisplayActions() {
    DispatchQueue.main.asyncAfter(deadline: .now() + 1) {
      Navigation.go(.main, clearHistory: false, transition: .FROM_LEFT)
    }
  }
}
Step Three: Build the Main Page
Let’s build our main page. The main page is divided into three rows. The first row is occupied by the heroImage and it works by randomly displaying the images of all books in each book category at a time.
This heroImage is given a 300 height. The ctrlListBookCatalog in the second row is a List-Control designed to accommodate all our four book categories. The toolBar, set to the far end of the page, will help users navigate to the Search page and More page:

Below you have the MainPageAdapter class that binds data from the model to the ctrlListBookCatalog and heroImage.
We also have to initialize the items property of the ctrlListBookCatalog with data from every book category method declared inside the MainPageAdapter class so that all the visual controls defined inside the ctrlListBookCatalog element, via the elementProvider object, can display data assigned to them in the way they are configured.
heroImage is defined inside the showRandomBook() method to depend on the random image data assigned to selectedBook variable from randomBooks array. Finally, we have to call the showRandomBook() method inside the onEnter() method so that heroImage can change to a different book image anytime a user enters the main page.
Check out the complete code for the code snippet provided below:
import Dispatch
import Foundation
import ScadeKit
import ScadeUI

class MainPageAdapter: SCDLatticePageAdapter {

  public var randomBooks: [Book] = []
  public var selectedBook: Book?
  let MAX_BOOK_NAME_LENGTH = 15

  // page adapter initialization
  override func load(_ path: String) {
    super.load(path)

    self.page?.onEnter.append(
      SCDWidgetsEnterEventHandler { [weak self] _ in
        self?.showRandomBook()
      })

    self.fetchAdventure()
    self.fetchFantasy()

    self.fetchHorror()

    self.fetchHealth()

    self.toolBarItem2.onClick { _ in
      Navigation.go(.search, clearHistory: true)
    }

    self.toolBarItem4.onClick { _ in
      Navigation.go(.settings, clearHistory: true)
    }

    self.ctrlListBookCatalog.elementProvider { (genre: Genre, element) in
      ......
    }
  }

  private func addRandomBooks(_ books: [Book]) {
    ......
  }

  private func showRandomBook() {
    .......
  }

  private func fetchAdventure() {
    CatalogManager.shared.fetchGenre(with: "Adventure", lbCategory: "Adventure") {
      ......
    }
  }

  private func fetchFantasy() {
    CatalogManager.shared.fetchGenre(with: "Fantasy", lbCategory: "Fantasy") {
      ......
    }
  }

  private func fetchHorror() {
    CatalogManager.shared.fetchGenre(with: "Horror", lbCategory: "Horror") { [weak self] horror in
      ......
    }
  }

  private func fetchHealth() {
    CatalogManager.shared.fetchGenre(with: "Health", lbCategory: "Health") { [weak self] health in
      ......
    }
  }
}
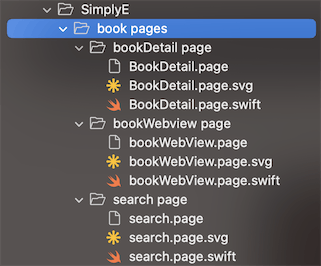
Step Four: Let's work on the Book's Pages
Once more, we'll create a new folder called book pages inside the project's root folder. This newly created folder will have a subset of folders that includes the bookDetail page, bookWebview page, and search page. Then, we'll create a page each into these subsets and call it BookDetail.page, bookWebview.page, and search.page respectively:
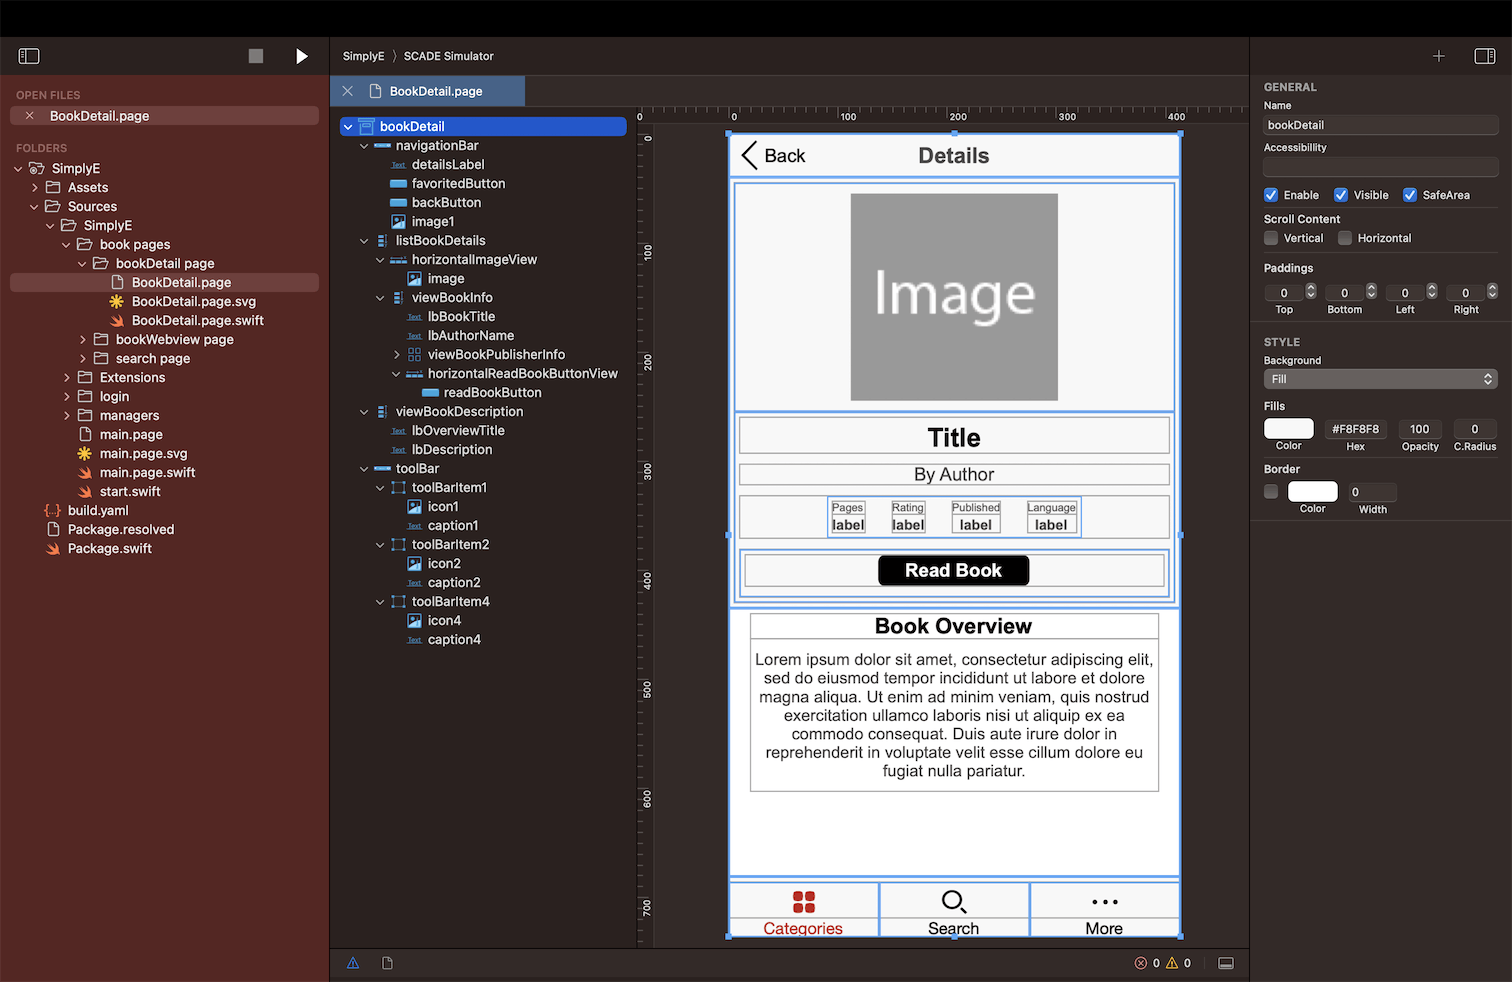
4a. Design and define the Logic for BookDetail.page
The BookDetail.page is designed into a navigationBar, listBookDetails, viewBookDescription:
the
navigationBarcontains abackButtonand adetailsLabellistBookDetailsis set up to retain vital information about a book, including the book's cover image, title, author, page count, read-book button, etc.viewBookDescriptionis intended to only hold each book's overview and description labelsThree
toolBarItemscreated inside thetoolBarallow users to go to the search page, the More page, or return to the main page.
We declared a book named variable of the type Book class inside the BookDetailPageAdapter class in the BookDetail.page.swift file. The show() method uses the book variable as a medium to pass data to all the needed properties on the BookDetail.page. However, if we don't downcast the data parameter of the show() method as an object of the Book model and also assign it to the data parameter of super.show(), these properties won't display their respective assigned values on the BookDetail.page.
View the full code for the provided code snippet:
import Dispatch
import Foundation
import ScadeKit

class BookDetailPageAdapter: SCDLatticePageAdapter {

  var book: Book?

  // page adapter initialization
  override func load(_ path: String) {
    super.load(path)

    self.backButton.onClick { _ in
      Navigation.back()
    }

    self.image1.onClick { _ in
      Navigation.back()
    }

    self.toolBarItem1.onClick { _ in
      Navigation.go(.main)
    }

    self.toolBarItem2.onClick { _ in
      Navigation.go(.search)
    }

    self.toolBarItem4.onClick { _ in
      Navigation.go(.settings)
    }

    self.readBookButton.onClick { _ in
      Navigation.go(.bookWebView, with: self.book ?? "")
    }

    self.favoritedButton.onClick { _ in
      self.fetchClickedBook()
    }

  }

  override func show(view: SCDLatticeView?, data: Any) {
    super.show(view: view, data: data)

    if let book = data as? Book {

      self.book = book

      lbBookTitle.text = book.volumeInfo.title ?? ""
      lbAuthorName.text = "by \(book.volumeInfo.authors?[0] ?? "Nothing")"
      lbPublished.text = book.volumeInfo.publishedDate ?? ""
      lbLanguage.text = book.volumeInfo.language ?? ""
      lbDescription.text =
        book.volumeInfo.description ?? "No Overview available for this Particular Book"
      lbPages.text = book.volumeInfo.pageCount.map(String.init(describing:)) ?? "NA"
      lbRating.text = book.volumeInfo.averageRating.map(String.init(describing:)) ?? "NA"

      if let bitmap = horizontalImageView["image", as: SCDWidgetsImage.self] {
        .......
        }
      }
    }
  }
4b. Set up the bookWebView.page and provide its logic
Only two rows make up the BookDetail.page, which contains the navigationBar and webView controls:
The
navigationBar, which contains adoneButton,titleLabeland areloadButton, occupies the first rowThe
doneButtonis for returning to the books' detail page while thereloadButtonis for reloading the webpage of a bookThe
webViewcontrol holds the second. We'll be using thiswebViewto load our books webpages whenever a user clicks on thereadBookButtonon theBookDetail.page:

As we did for the BookDetail.page.swift file, we will also use the show() method inside the bookWebView.page.swift file. This simply means we'll need to connect the webView control to books' webpage data inside the show() method in order to successfully load the webpages of our books inside our app when a user clicks the readBookButton on the BookDetail.page:
import Foundation
import ScadeKit

class BookWebViewPageAdapter: SCDLatticePageAdapter {

  var url: URL?

  // page adapter initialization
  override func load(_ path: String) {
    super.load(path)

    self.doneButton.onClick { _ in
      Navigation.back()
    }

    self.reloadButton.onClick { _ in
      self.webView.load(self.url?.absoluteString ?? "")
    }
  }

  override func show(view: SCDLatticeView?, data: Any) {
    super.show(view: view, data: data)

    if let book = data as? Book {
      guard let bookWebView = book.volumeInfo.previewLink else { return }
      guard var url = URL(string: bookWebView) else { return }
      guard let domain = url.host else { return }
      self.titleLabel.text = domain

      // force using https in all requests
      if url.scheme == "http" {
        var components = URLComponents(url: url, resolvingAgainstBaseURL: false)!
        components.scheme = "https"
        url = components.url!
        self.url = components.url!
      }
      webView.load(url.absoluteString)
    }
  }
}
4c. Establish the search.page's layout and logic
The search.page is divided into four rows, with the horizontalTextboxView in the first row, the searchLabelTitle in the second, the ctrlListBooks in the third, and the toolBar in the fourth, respectively:
The
horizontalTextboxViewhouses thetextboxcontrol that listens to text changes when typing text into the keyboard to search for a particular bookThe
ctrlListBooksloads all books in every category before it then loads the results of the related searched book in thetextboxThe
toolBarItemsgenerated inside thetoolBarenable users to return to themain pageand access theMore page

We are going to use the elementProvider object to access and assign values to all the listed elements inside the ctrlListBooks. That's not all, there is also a need to initialize the items property of the ctrlListBooks with the results of all the books categories API data so that we can have a list of all our books categories on the ctrlListBooks of the search.page during launch time.
Secondly, we also need to call the onTextChanged() method on the textbox control on the search.page so as to listen and use its textbox.text to fetch searched book results from the getBook() method and add the results to the items property of the ctrlListBooks.
Check out the full code for the code snippet shown below:
import Dispatch
import Foundation
import ScadeGraphics
import ScadeKit
import ScadeUI

class SearchPageAdapter: SCDLatticePageAdapter {

  var downloadedBooks: Set<String> = []

  let MAX_BOOK_NAME_LENGTH = 32

  func addBooks(books: [Book]) {
    for book in books {
      ......
      }
    }
  }
  // page adapter initialization
  override func load(_ path: String) {
    super.load(path)

    self.fetchAdventurousBooks()
    self.fetchFantasyBooks()
    self.fetchHorrorBooks()
    self.fetchHealthBooks()

    self.ctrlListBooks.elementProvider { (book: Book, element) in
      element.onClick.append(
        SCDWidgetsEventHandler { [weak book] event in
          guard let book = book else { return }
          Navigation.go(.BookDetail, with: book)
        })
    }

    ctrlListBooks.onItemSelected { event in
      ......
    }

    self.textbox.onTextChange.append(
      SCDWidgetsTextChangeEventHandler { [weak self] event in
        if let textbox = event?.target as? SCDWidgetsTextbox {
      }})
  }

  private func fetchAdventurousBooks() {
    APICaller.shared.getAdventurousBooks { [weak self] result in
      ......
    }
  }

  private func fetchFantasyBooks() {
    APICaller.shared.getFantasyBooks { [weak self] result in
      ......
    }
  }

  private func fetchHorrorBooks() {
    APICaller.shared.getHorrorBooks { [weak self] result in
      ......
    }
  }

  private func fetchHealthBooks() {
    APICaller.shared.getHealthBooks { [weak self] result in
      ......
    }
  }
}

extension SCDSvgRGBColor {
  ......
}

extension SCDWidgetsWidget {
   .......
}
Conclusion
Now you can run the app and enjoy the newly built eBook app using SCADE! This is just a little bit of what you can do with SCADE.
The full source code of this tutorial can be found here.